Common Defects and Solutions in Gear Hobbing
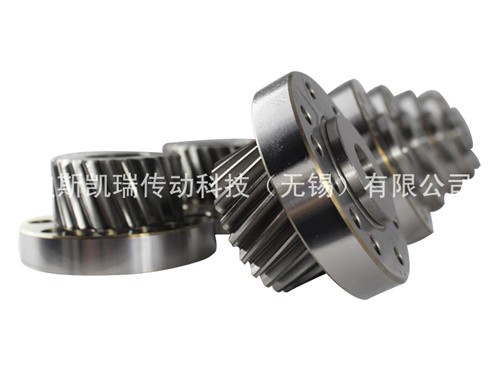
Gear is a common part in mechanical product design. Hobbing is the most widely used part in gear profile processing. It can process not only straight and helical cylindrical gears, but also worm gears and spline shafts. Hobbing is suitable for single piece small batch production and mass production. This article will introduce the processing principle of hobbing gear and the treatment of common defects.
Hobbing gear can be regarded as gear and rack transmission without meshing clearance. When the hobbing gear rotates for a week, it is equivalent to the rack moving a cutter tooth in the normal direction. Hobbing is the most widely used cutting method at present. It can process involute gears, circular arc gears, cycloid gears, sprockets, ratchets, worm gears and envelope worm, and its accuracy can generally reach DIN4-7 level. At present, the advanced hobbing technologies include multi-head hobbing, hard surface hobbing, large gear hobbing and high-speed hobbing.
Incorrect number of teeth
Main cause
1) incorrect adjustment of gear for gear-splitting exchange
2) Error in hob selection
3) The workpiece blank size is correct
4) Wjen hobbing helical gears, the additional motion direction is not right.
Resolvent
1) Re-adjust the gear of gear-splitting exchange and check whether the middle gear is correctly installed.
2) Rational selection of Hobs
3) Replacement of workpiece blanks
4) Increase or decrease the intermediate wheel in differential exchange gears
2. Abnormal Tooth Profile-Tooth Surface Arrowing
Main cause
There are four kinds of workpiece defects in hobbing cutter because of too big error of tooth profile or too much instantaneous speed ratio of inability to split teeth.
1) After the hob is grinded, the cutter teeth have poor equivalence.
2) Hob Axial Moving Forest
3) Large radial runout of hob
4) blunt hob
Resolvent
Main methods: Focus on the quality of hob grinding, hob installation accuracy and machine tool spindle geometric accuracy:
1) Controlling the grinding quality of Hobs
2) Guarantee the installation accuracy of hobs, while installing hobs, can not knock; gasket face is flat; nut face is vertical; cone hole should be clean; bracket installed, can not leave clearance.
3) Reviewing the rotational accuracy of machine tool spindle and repairing and adjusting hob spindle bearings, especially thrust gaskets
4) Replacement of new knives
3. Abnormal Tooth Profile-Asymmetric Tooth Profile
Main cause
1) incorrect hob installation
2) After hob grinding, the radial error of the front edge surface is large.
3) The helix angle or lead error is large after hob grinding.
4) The error of hob installation angle is too large
Resolvent
1) Setting knives with "gnawing knife and flower" method or knife gauge
2) Controlling the Grinding Quality of Hobs
3) Installation Solution of Re-adjusting Hob
4. Abnormal Tooth Shape-Incorrect Tooth Shape Angle
Main cause
1) Tooth angle error of hob itself is too larg
2) After hob grinding, the radial error of the front edge surface is large.
3) The error of hob installation angle is large.
Resolvent
1) The Accuracy of Rational Selection of Hobs
2) Controlling the Grinding Quality of Hobs
3) Re-adjust the installation angle of hob
5 Tooth Profile Abnormality-Periodic Error of Tooth Profile
Main cause
1) After hob installation, the radial or axial movement is large.
2) Non-uniform rotation of machine tool table
3) Eccentricity or bumping of tooth surface in installation of cross-wheel or gear-splitting exchange
4) Sliding board of tool holder is loose
5) The unreasonable clamping of workpiece causes oscillation
Resolvent
1) Control the installation accuracy of Hobs
2) Check the axial movement of indexing worm of machine tool table and adjust and repair it.
3) Inspection of the installation and operation of the spanning and gear-splitting exchange gears
4) Plug iron for adjusting tool holder slide
5) Correct scheme of reasonable selection of workpiece clamping
6 Tooth Ring Radial Runout Excess
Main cause
The center of workpiece inner hole does not coincide with the revolving center of machine tool table
Regarding machine tools and fixtures:
Large radial runout of worktable
Spindle wear or radial runout
Deviation or loosening of top and bottom thimbles
The fixture positioning end face is not perpendicular to the revolving center line of the worktable
Work clamping components, such as washers and caps, are not accurate enough
Relevant aspects of work:
Diameter Excess of Workpiece Positioning Hole
our-alignment of coaxiality between the outer circle and the inner hole when the outer circle of the aligning workpiece is installed
Workpiece clamping rigidity difference
Resolvent
Focusing on the Rotary Accuracy of the Controller Setting Workbench and the Correct Installation of the Workpiece
Regarding machine tools and fixtures:
Inspection and repair of rotary guide of worktable
Reasonable Use and Maintenance of Workpiece Spindle
Accuracy of Repairing Posterior Column and Top Needle
The fixture positioning end is not perpendicular to the revolving center line of the worktable
Improving the accuracy of workpiece clamping components, such as washers and caps
With regard to workpieces:
Controlling the Dimensional Accuracy of Workpiece Positioning Hole
Controlling Coaxiality Error of Outer Circle and Inner Hole of Workpiece
The main reason why clamping force should be applied to parts with enough rigidity
7 Tooth Direction Error Excess
Main cause
The hob's vertical feed direction deviates too much from the axis direction of the inner hole of the billet. When processing helical gears, there is also incorrect additional motion.
Regarding machine tools and fixtures:
The unequal axes between the triangular guide of the column and the worktable
The end face of the worktable fluctuates greatly
Upper and lower apex with different axes
Large meshing clearance of indexing worm gear pair
There are periodic errors in the transmission of indexing worm gears
Vertical feed screw pitch error is large
Great Error of Gear Splitting and Differential Exchange
Relevant aspects of work:
The two ends of the billet are not parallel
Workpiece positioning hole is not perpendicular to end face
Resolvent
The aim is to control the geometric accuracy of machine tools and correct installation of workpieces.
Regarding machine tools and fixtures:
Repair the accuracy of column and control the thermal variant of machine tool
Revolving accuracy of repairing worktable
Accuracy of restoring posterior posts or top and bottom thimbles
Reasonable adjustment of meshing clearance of indexing worm gear pair
Repairing the parts accuracy of indexing worm gear pair
Vertical feed screw should be replaced in time when its accuracy can not be reached due to wear and tear.
Calculating error of differential exchange gear should be controlled
Workpiece-related aspects
Controlling Parallelism Error of Two End Faces of Blank
Controlling the Verticality of the Positioning Hole and the End Face of the Blank
Over-tolerance of accumulated error correlation of 8 teeth spacing
Main cause
The maximum error of the uneven rotation of the hobbing table is too large:
One span of transmission accuracy of indexing worm gear pair
Radial runout and large end runout of worktable
Too loose meshing or bumping phenomena of gear-splitting exchange wheels
Resolvent
Focusing on the accuracy of the gear-splitting kinematic chain, especially the indexing worm gear pair and hob.
Repairing transmission accuracy of indexing worm gear pair
Revolving accuracy of repairing worktable
Check the gear and meshing tightness and running condition
9 Tooth Surface Defect-Tea
Main cause
Inhomogeneous Material of Tooth Blank
Improper heat treatment of tooth blank
Incorrect selection of cutting parameters results in chip tumors
Low efficiency of cutting fluid
The hob is blunt and not sharp
Resolvent
Controlling the Material Quality of Tooth Blanks
Correct selection of heat treatment methods, especially hardness after quenching and tempering, suggests normalizing treatment.
Correct selection of cutting parameters to avoid chip tumors
Choosing cutting fluid correctly, especially paying attention to its lubrication performance
Replacement of a new knife
10 Tooth Surface Defect-Grinding Tooth
Main cause
The abrupt change of the position between the hob and the billet results in:
Too loose triangular guide of pillar causes sudden change of hob feed, too tight triangular guide of pillar causes creeping phenomenon.
Large meshing clearance of helical gears in tool holder
Oil pressure instability
Resolvent
Adjustment of Triangular Guideway of Column: Requirement of Tightness and Appropriateness
The tool holder should be replaced if it is worn out due to long service time.
Resonable maintenance of machine tools, especially cleanliness, to keep the oil circuit unblocked: oil pressure remains stable
11 Tooth Surface Defect-Vibration Mark
Main cause
Vibration causes:
Large clearance in a transmission link of machine tool
Insufficient clamping rigidity of workpiece and hob
Selection of cutting parameters is too large
Large clearance after rear bracket installation
Resolvent
Finding and eliminating vibration sources:
Timely overhaul of machine tools with long service time and serious wear and tear
Increasing the clamping rigidity of hobs, such as reducing the distance between supports: Hobs with shanks should be selected as large as possible. Increase the clamping rigidity of workpiece: for example, maximize the supporting end face, the supporting end face (including workpiece) only quasi-concave: shorten the distance between top and bottom pins
Correct selection of cutting parameters
Correct installation of rear bracket
12 Tooth Surface Defect-Fish Scale
Main cause
Imroper heat treatment of billet, in which steel parts after quenching and tempering treatment are more common
Resolvent
Control hardness of conditioning treatment as appropriate
It is suggested that normalizing should be used as the preheating point of the billet.
Previous page:Introduction of Gear Processing
The cutting-edge gear processing technology, brilliant fight!
Publication time:2019-10-09
Development Trend of Gear Processing Technology and Equipment
Publication time:2019-10-09
Some Key Points to Be Noticed in Gear Processing and Manufacturing
Publication time:2019-10-09
Why do we always want to do Gear processing, but we cant do it well?
Publication time:2019-10-09
Development Trend of Gear Processing Technology and Equipment
Publication time:2019-10-09
Introduction of Gear Processing
Publication time:2019-10-09
Common Defects and Solutions in Gear Hobbing
Publication time:2019-10-09
Several Key Technologies in Rack Grinding Machine
Publication time:2019-10-09
What is gear machining?
Publication time:2019-10-08
The Advantage of Rack Processing Roller Rack in Motion Mechanism
Publication time:2019-10-08
Introduction to the Characteristics and Parameters of Rack Machining Rack
Publication time:2019-10-08
Common Materials for Gear Processing
Publication time:2019-10-08
1The cutting-edge gear processing technology, brilliant fight!
2019-10-09

2Development Trend of Gear Processing Technology and Equipment
2019-10-09

3Some Key Points to Be Noticed in Gear Processing and Manufacturing
2019-10-09

4Why do we always want to do Gear processing, but we cant do it well?
2019-10-09

5Development Trend of Gear Processing Technology and Equipment
2019-10-09

6Introduction of Gear Processing
2019-10-09


